Introduction
Dependencies
None! This is a 10 minute tutorial where you will create your first website! It is highly recommended if you are new to web development as it'll give you a glimpse of what's possible! :)
How is a website made?
Websites are simply a collection of files with markup, styles, and scripts. A browser opens up a specific file (called index.html) that describes the elements that are on a page. Elements are what make up a webpage — buttons, images, titles, input boxes, and more. Here is a list of all HTML (Hypertext Markup Language) elements.
To style a page and make it look nice, we use something called CSS (Cascading Style Sheets). Here is a list of all CSS properties.
The combination of HTML and CSS allow us to craft amazing web experiences. However, to add interactivity, JavaScript is needed. We won't be using JavaScript at all in this short tutorial, but you'll get a decent understanding of it in future projects.
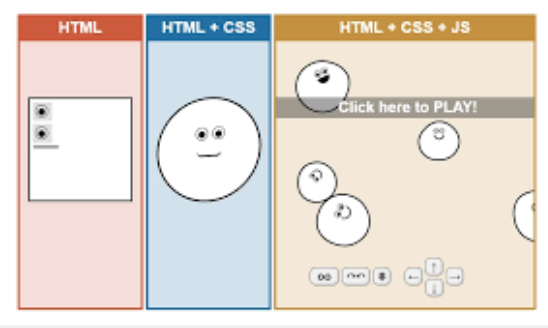
If you look at the graphic above, you can see that HTML are the raw, unstyled elements. They're not aligned or formatted — just on the screen. Next, CSS allows us to format and style everything to make the elements into a smiley face. Lastly, JavaScript will allow you to make interactive user experiences — such as a game!
Your First Website
Let's get started
We'll be using repl.it, which is an online programming interface. Click on the repl.it embeded below and create an account. Once you type, a copy of the project should be created under your account.
Markup
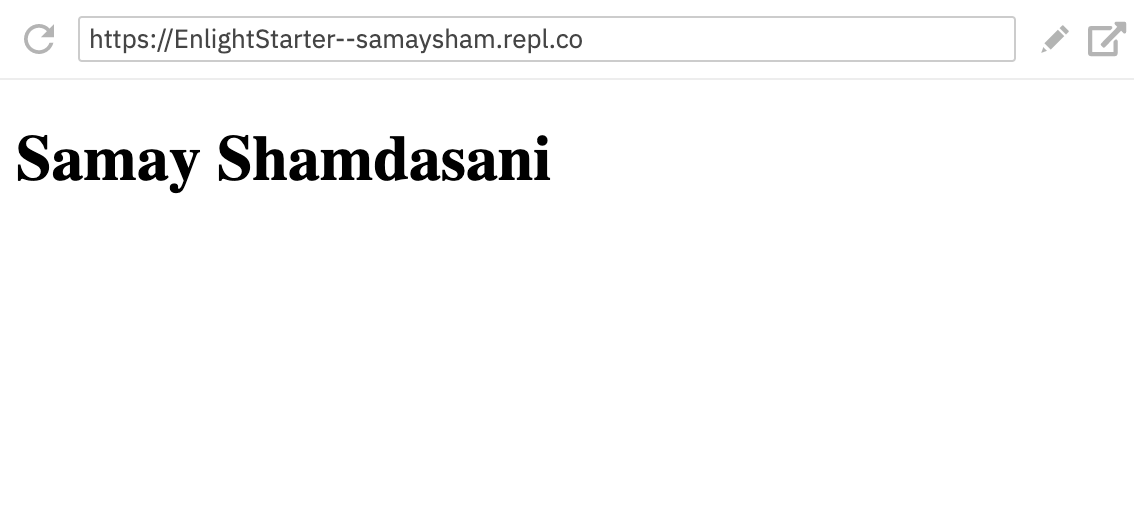
Let's start by adding what's most important: content. To start, I'm going to add my name in the <body> of our HTML file. Feel free to write yours!
<body>
<h1> Samay Shamdasani </h1>
</body>
You just wrote your first line of HTML! An <h1> tag is a header tag. Notice how we have an ending </h1> to indicate that the element ends there. If you run your repl.it, you should see your name rendered in Times New Roman.
You can also open your site up in a new tab by clicking the button in the top right. Cool, right? However, our site isn't that aestetically pleasing. Don't worry — we'll fix that soon.
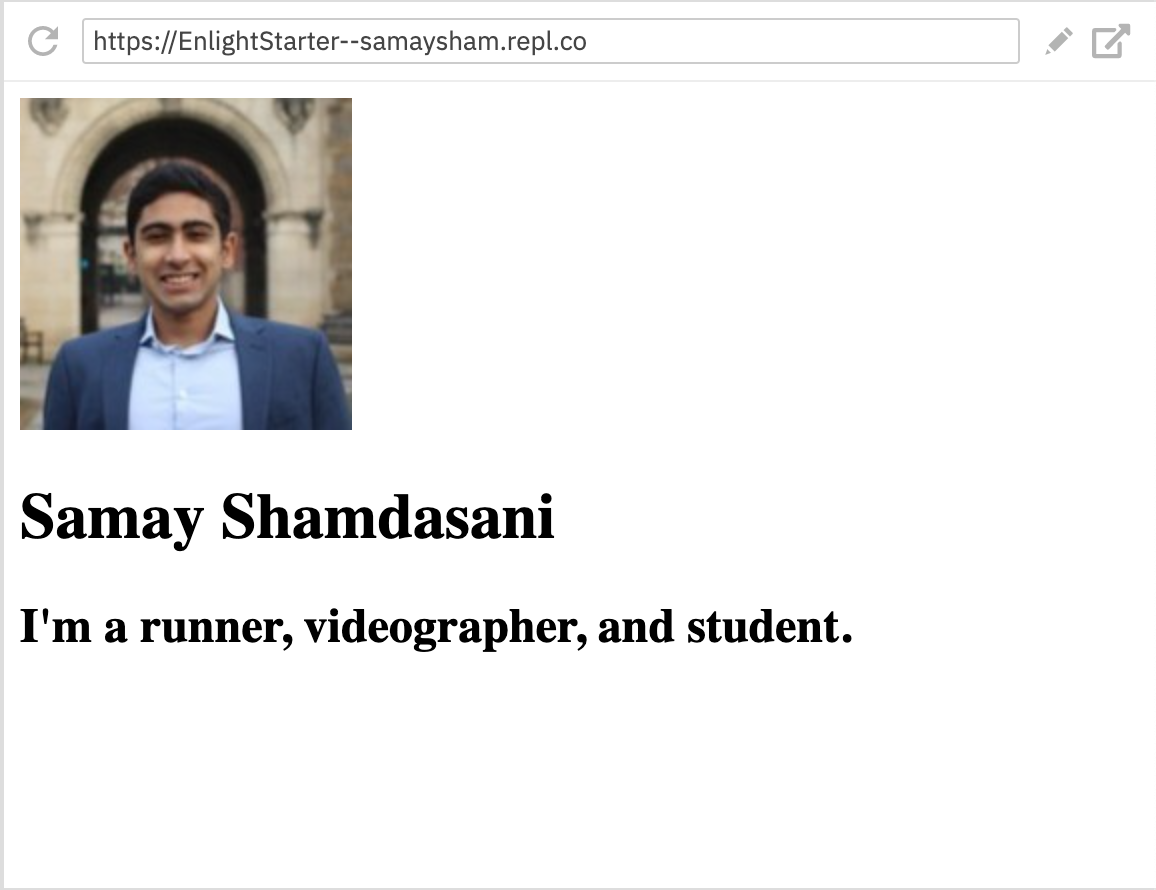
For now, I'm also going to add an image and description for my site. This is what my body looks like:
<img src="https://media-exp1.licdn.com/dms/image/C4D03AQFPLoh2sw61cg/profile-displayphoto-shrink_200_200/0?e=1595462400&v=beta&t=N9aDuyT9DX9GBfuudZ6JwvQYKr5KhSuCArabRoJxuIc" />
<h1>Samay Shamdasani</h1>
<h2>I'm a runner, videographer, and student.</h2>
As you can see, I used an <img> tag to import an image into my webpage. To import an image, you need to add an image's address in the src property. Feel free to find any image on the web, right click on it, and copy its image address. Then, paste the image address in the src property!
I also added an <h2> to have a smaller header text below my title. This is what my site looks like now! Your site should look similar.
Okay — better! It's still not pretty though. Let's change that.
Styling
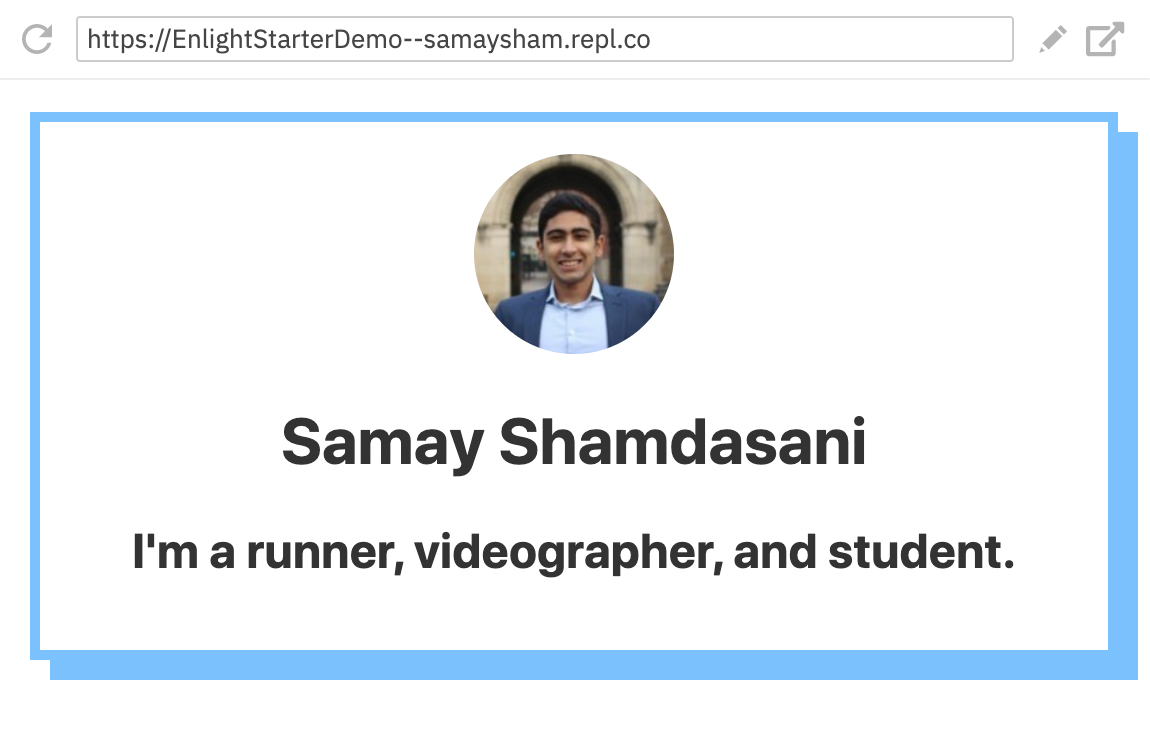
Open up the style.css file, which has been already linked to our index.html file using the <link/> tag in <head>. We will start by adding a margin to our html document, which is an offset on each side of the webpage:
html {
    margin: 16px;
}
Then, let's style the body element and change its font-family. I like the default Apple system font, so that's what I'll set it to. However, you can change this to any font on your system!
body {
  font-family: -apple-system, BlinkMacSystemFont, 'Segoe UI', Roboto, Oxygen, Ubuntu, Cantarell, 'Open Sans', 'Helvetica Neue', sans-serif;
}
Using the max-width and margin properties, we can set the maximum width the body element can take up on a page. We'll set it to 50em, where em is a unit used in typography. I also will align the text to the center using the text-align property. As you type these properties in, keep running the site to see the visual changes that happen as a result.
body {
  font-family: -apple-system, BlinkMacSystemFont, 'Segoe UI', Roboto, Oxygen, Ubuntu, Cantarell, 'Open Sans', 'Helvetica Neue', sans-serif;
  max-width: 50em;
  margin: 0 auto;
  text-align: center;
}

Okay, that looks better! Let's change the body font color to something a little more readable using the color property. We're also going to add some padding (more offset), a border (around the <body> element), and a cool box-shadow (this will give our wepage have a "3D" effect). Feel free to pick any hex color for any of these styles. This is what the body style block should look like now:
body {
  font-family: -apple-system, BlinkMacSystemFont, 'Segoe UI', Roboto, Oxygen, Ubuntu, Cantarell, 'Open Sans', 'Helvetica Neue', sans-serif;
  max-width: 50em;
  margin: 0 auto;
  text-align: center;
  padding: 16px;
  border: 5px solid #78c0ff;
  box-shadow: 10px 10px #78c0ff;
  color: #333;
}
Lastly, let's style the image to have a height of 100px and a border radius of 50% to make it a circle.
img {
  height: 100px;
  border-radius: 50%;
}
You built your first website!
Congrats! Click below to see what's next.
If you'd like to publish your site so that anyone on the internet can see, you can deploy it to Netlify using the Build a Personal Website project.