Interested in this project?
Continue LearningOne of my all-time favourite TV shows is Silicon Valley. In the fourth season of the show, a character named Jian Yang pitched his app idea called Seefood which was meant to be the Shazam for food. Instead, he created a different app called "Not Hotdog". While the app is very technically impressive, we can create the app Jian Yang originally set out to build using some JavaScript libraries and machine learning tools.
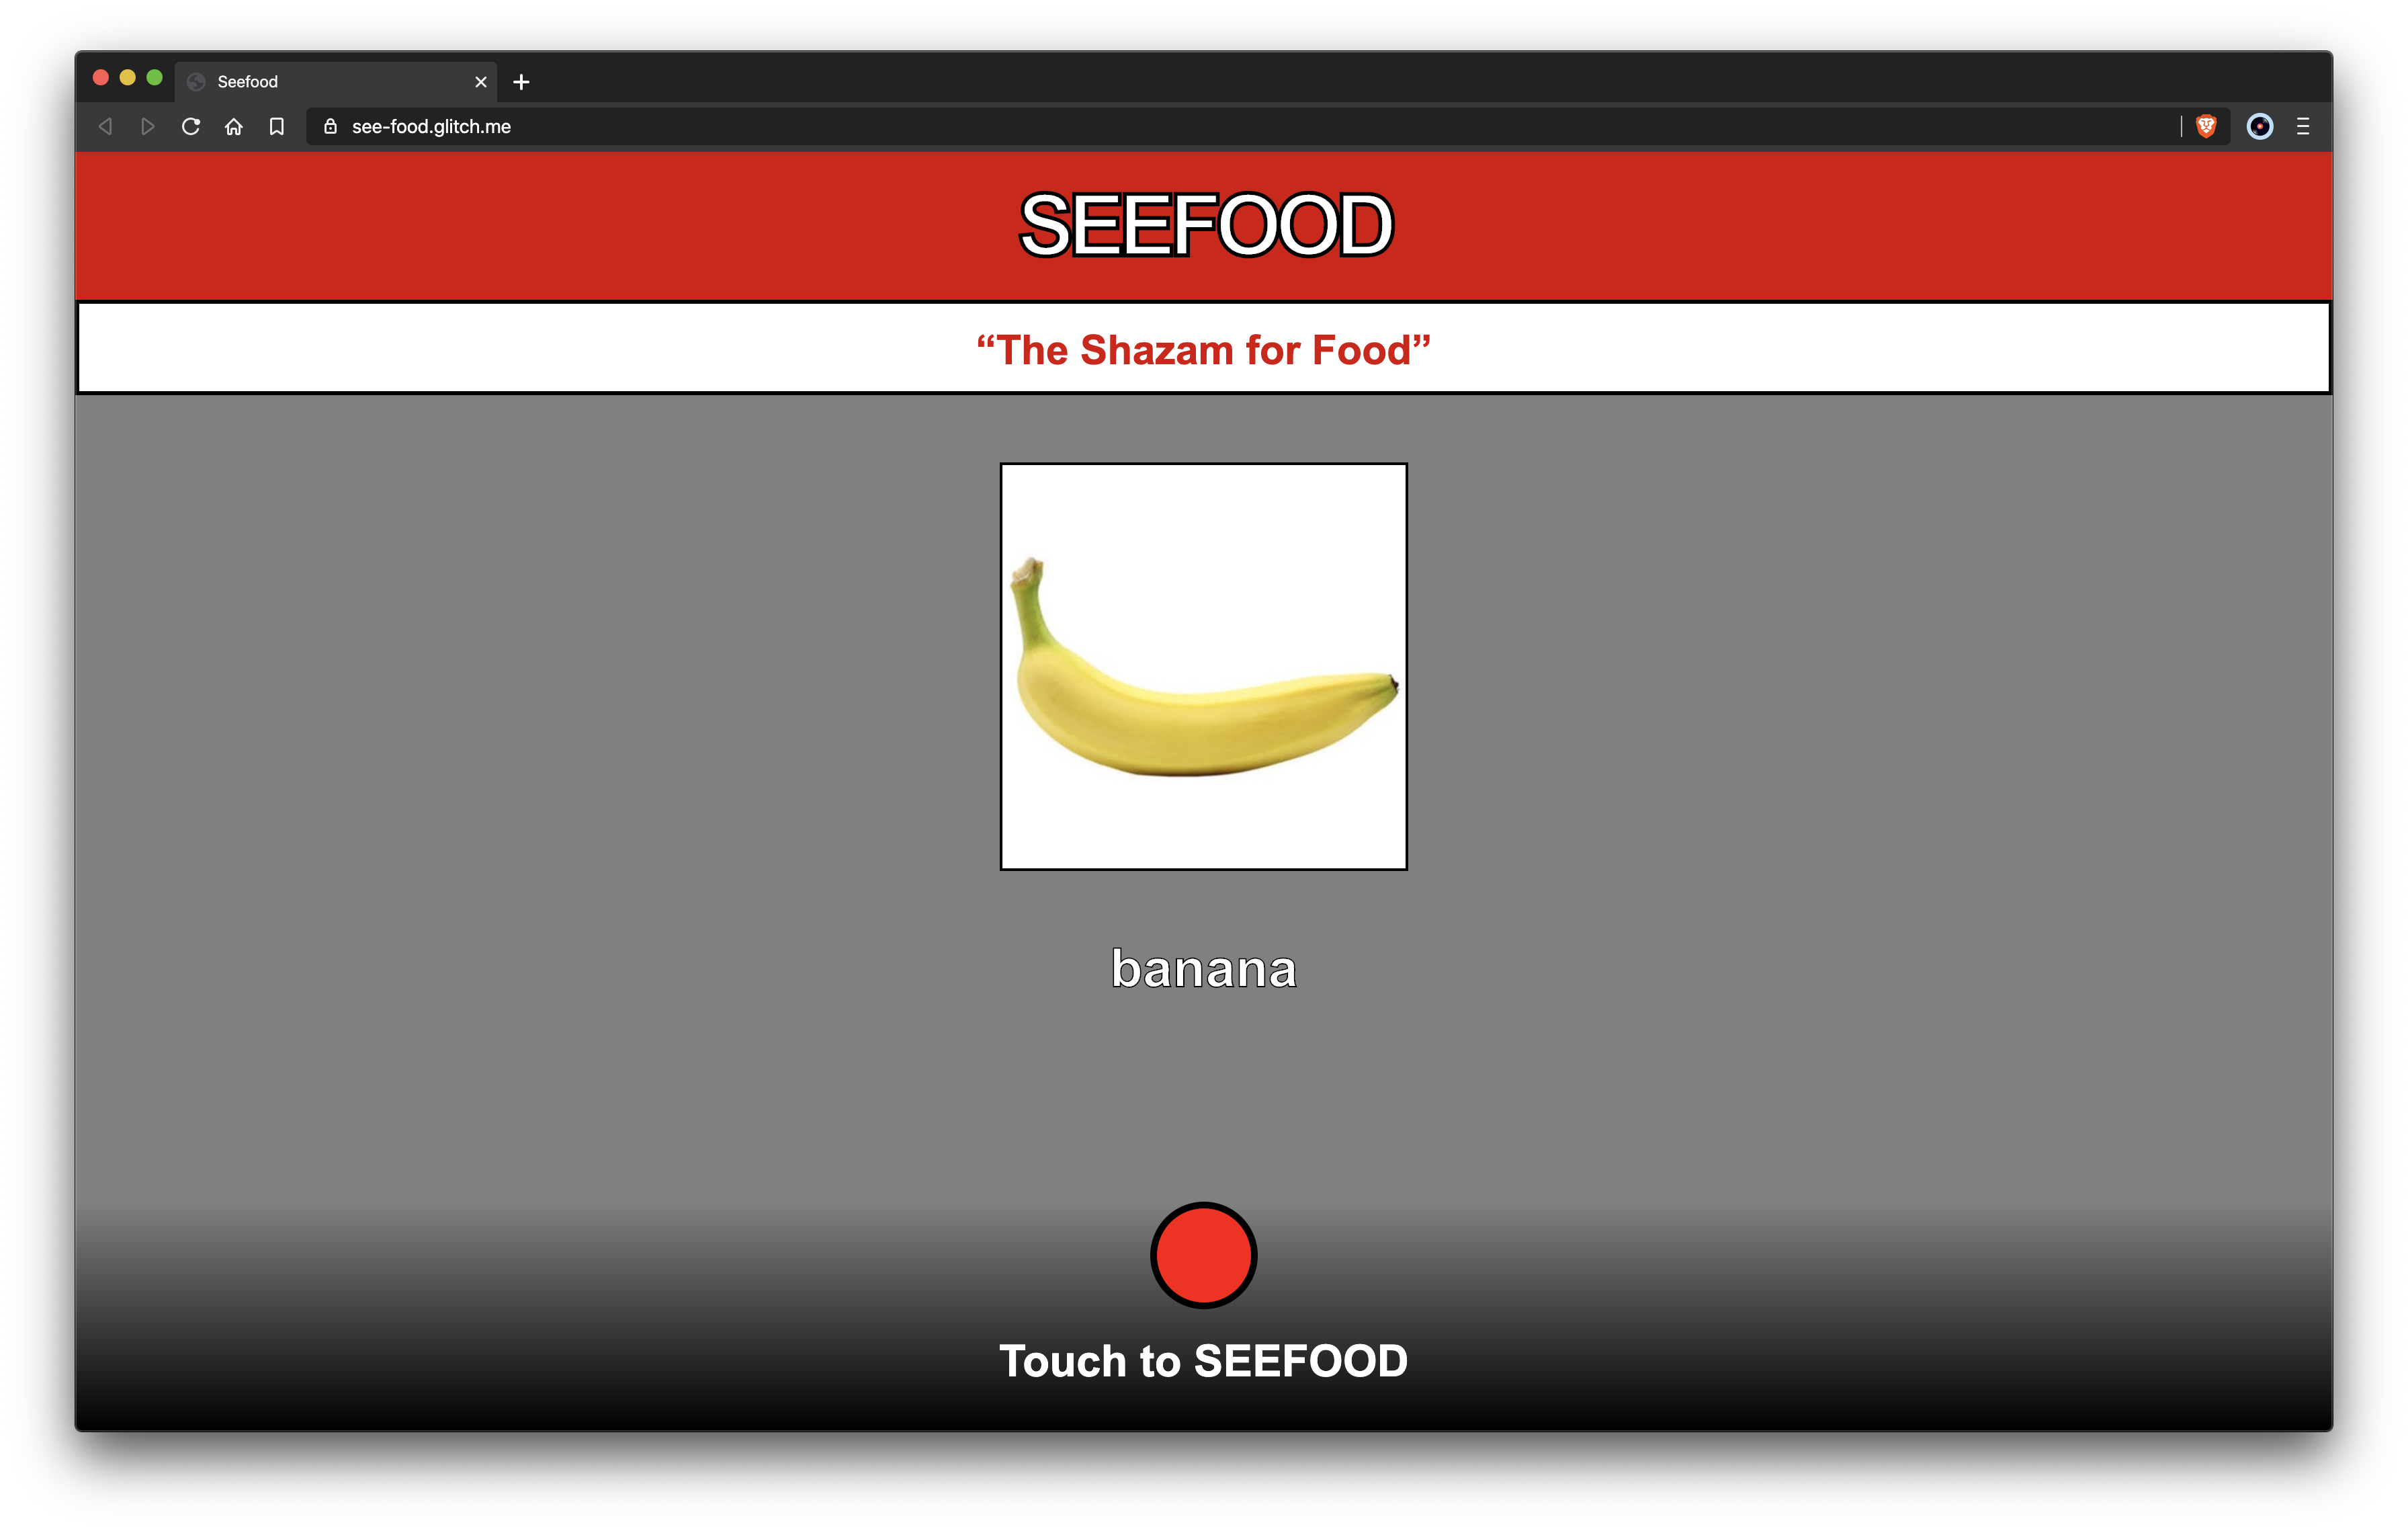
Here is a screenshot of the finished product. If I suddenly stop writing this tutorial it’s because I received venture funding for this startup.
)](https://cdn-images-1.medium.com/max/7168/1*Glw-a79VVSOgD6b_URXkgQ.png)
To build the app, we will use a JavaScript machine learning library called ML5 which is extremely easy to use and comes preloaded with several image classifier models like MobileNet, DarkNet, and DoodleNet.
Getting started with ML5 is as easy as placing this line of code into the head of your index.html file.
<script src="https://unpkg.com/ml5@0.4.3/dist/ml5.min.js](https://unpkg.com/ml5@0.4.3/dist/ml5.min.js)" defer></script>
Then, we can begin to use the functionality provided by the library using the global ml5 property on window.
Since this is a classic image classification problem we need to use a ml5.imageClassifier(). In another file, or within a <script> tag inside index.html, we can instantiate a new imageClassifier using the following constructor.
const classifier = ml5.imageClassifier(model, ?video, ?options, ?callback);
For our app, I am using the MobileNet image classification model which has been “trained on a database of approximately 15 million images” according to their docs.
const { ml5 } = window;
const classifier = ml5.imageClassifier('MobileNet', console.log);
Next, we simply use the classify function on classifier, as the name suggests, to classify the image. The classify function can take a HTMLImageElement and read its src so let’s also fetch our image from the DOM. The document.querySelector function allows us to access the HTMLElement with the class of image in our index.html file and we pass it into the classify function which takes an HTMLImageElement.
const image = document.querySelector(".image");

function classifyImage() {
  const results = await classifier.classify(image);
  // ...
}
Once we have our results from the async classify call we will also want to display the results. The return value from classifier.classify(image) is an array of objects that contain a label which is a string of the thing the model classified the image as and a confidence score from 0 to 1. For simplicity’s sake, we can take the first result and display it’s label. To display the result, we fetch the HTMLElement with the class result which is a div and then the h2 inside of it with the document.querySelector function. Then, set the innerText of the element with what we want to display.
const image = document.querySelector(".image");
const result = document.querySelector(".result h2");

async function classifyImage() {
  const results = await classifier.classify(image);
  result.innerText = results[0].label;
}
Now we simply to take user input and change the image src and reclassify the image each time.
In the index.html file we will add an image file upload input like this:
<input
  type="file"
  accept="image/*"
  onchange="handleUpload(this.files)"
/>
and then define the function handleUpload(files) which replaces the image.src with the image data of the first file, then calls classifyImage. Ideally we would just call classifyImage() but we need the setTimeout since a lot of image preloading functionality relies on setting the src of an image to be asynchronous. There are better workarounds than this, but it will do for now.
function handleUpload(files) {
  image.src = URL.createObjectURL(files[0]);
  setTimeout(classifyImage, 50);
}
In 14 lines of JavaScript, we have a fully functioning Seefood app. Even though the ML5 library makes machine learning extremely easy and almost trivial, I would highly suggest familiarizing yourself with the basics of machine learning. I personally found Welch Lab’s Machine Learning Demystified to be an amazing set of tutorials.
Teachable Machine
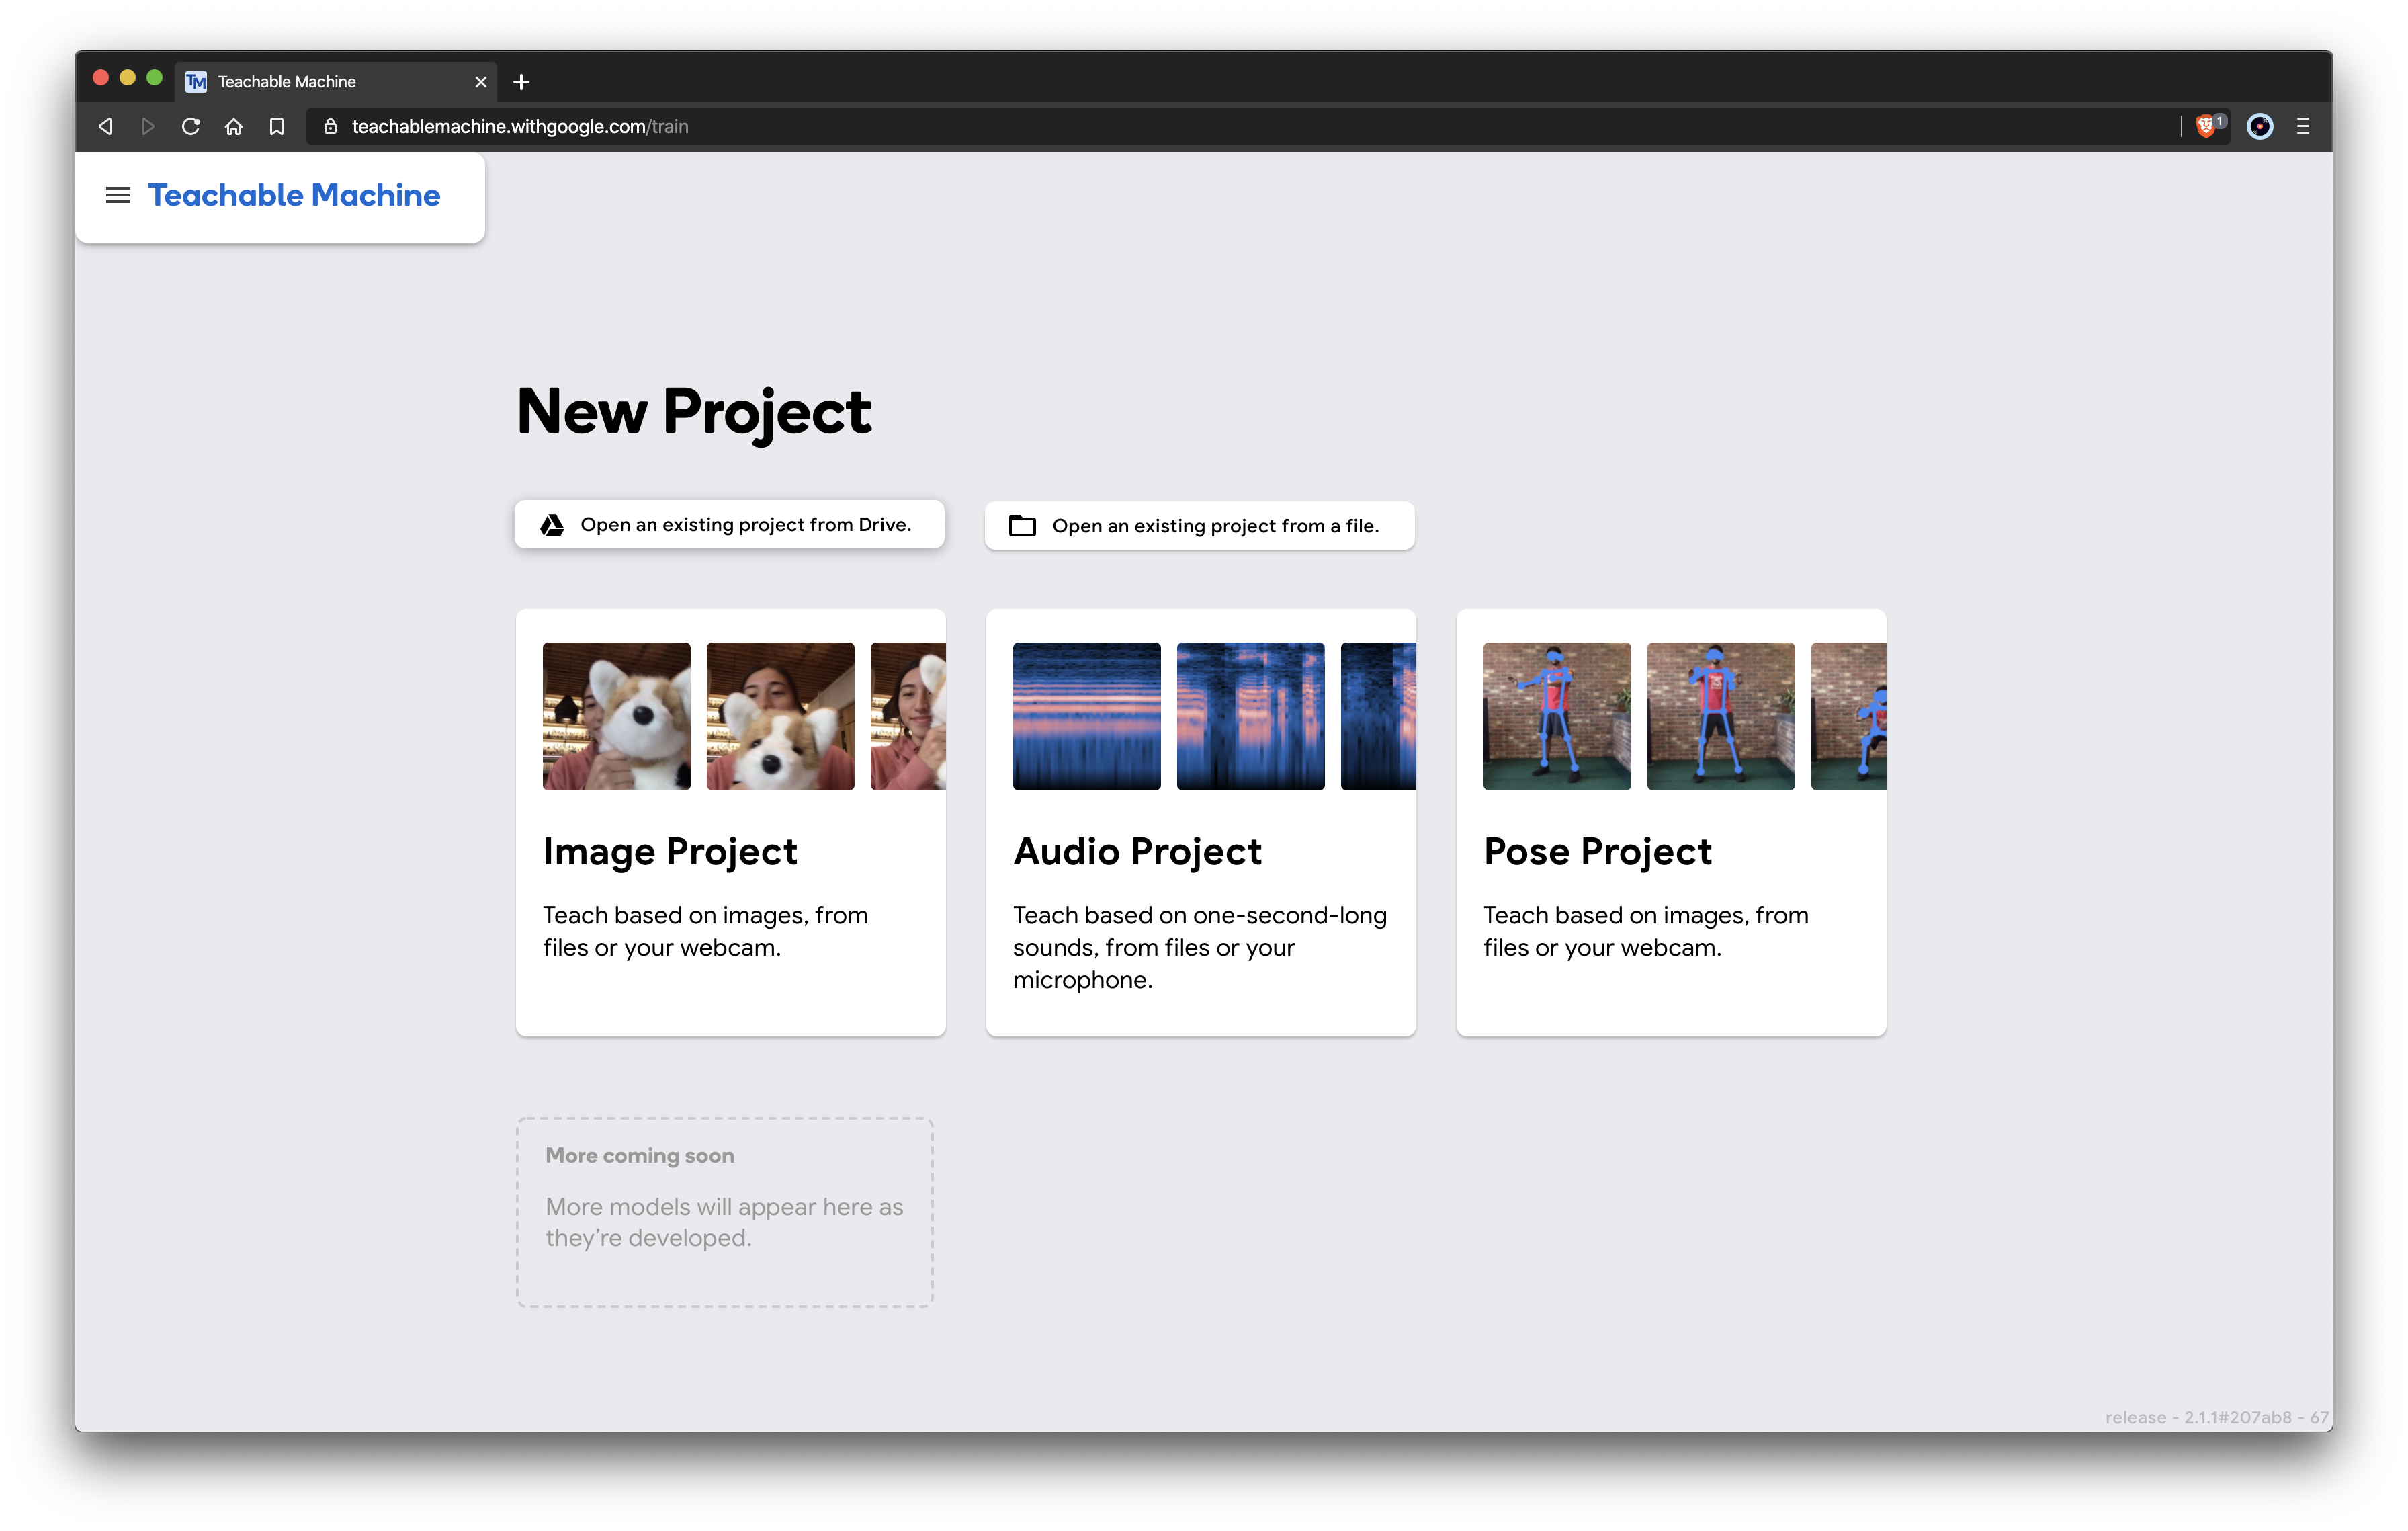
To go a step further in our machine learning with JavaScript journey let’s try and train our own model using Google’s Teachable Machine and then start using it for our seefood app.
Since we are writing an image classifier app we will want to select the image project.
We can begin to start uploading images, the premise of what we are doing is essentially providing a dataset of images and labels that teachable machine will “learn” from and then later on when we ask it to classify an image it will use its knowledge from the images we provide it here.
Then it will be able to take images and inputs and give labels and confidence as outputs.
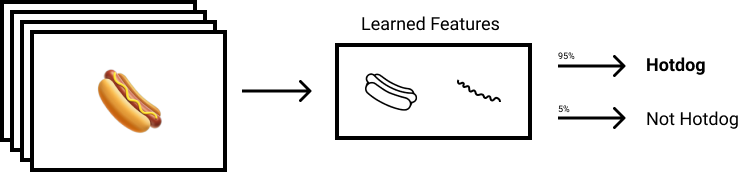
Let’s train our classifier to tell us whether something is a hotdog or not a hotdog.
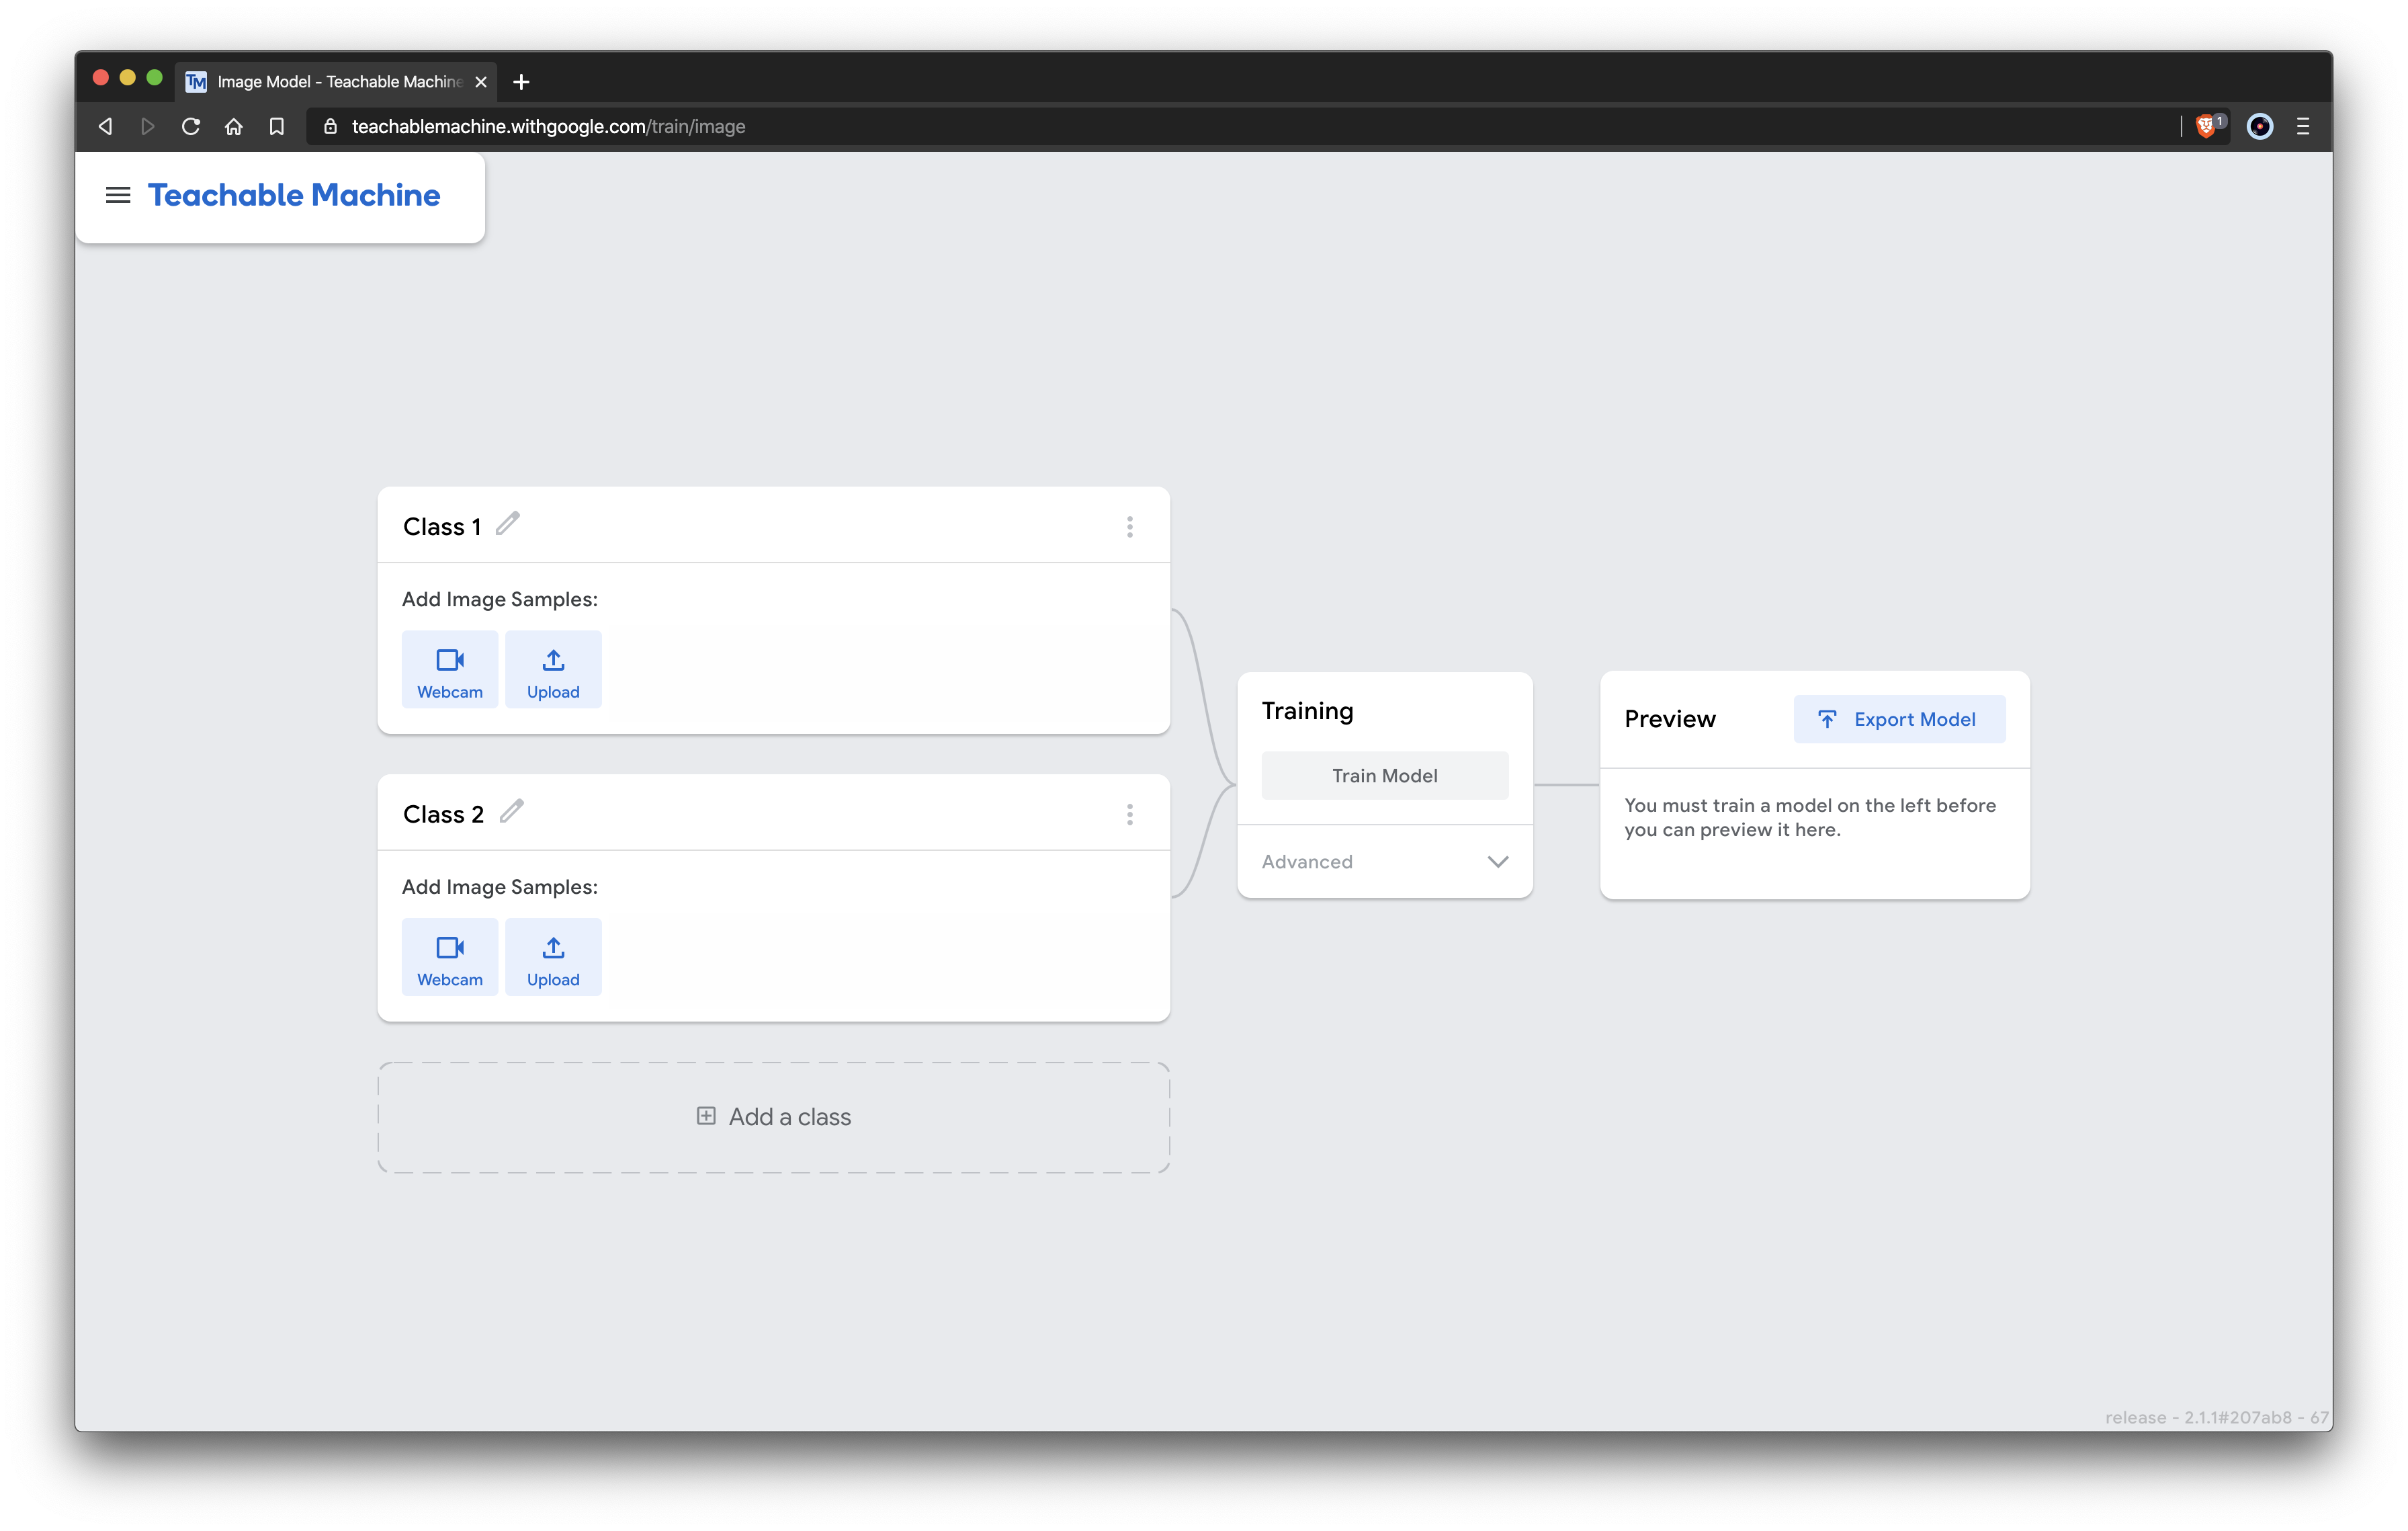
We will only need two classes in the teachable machine. I’ll label them accordingly and add some training data which I got from Kaggle.
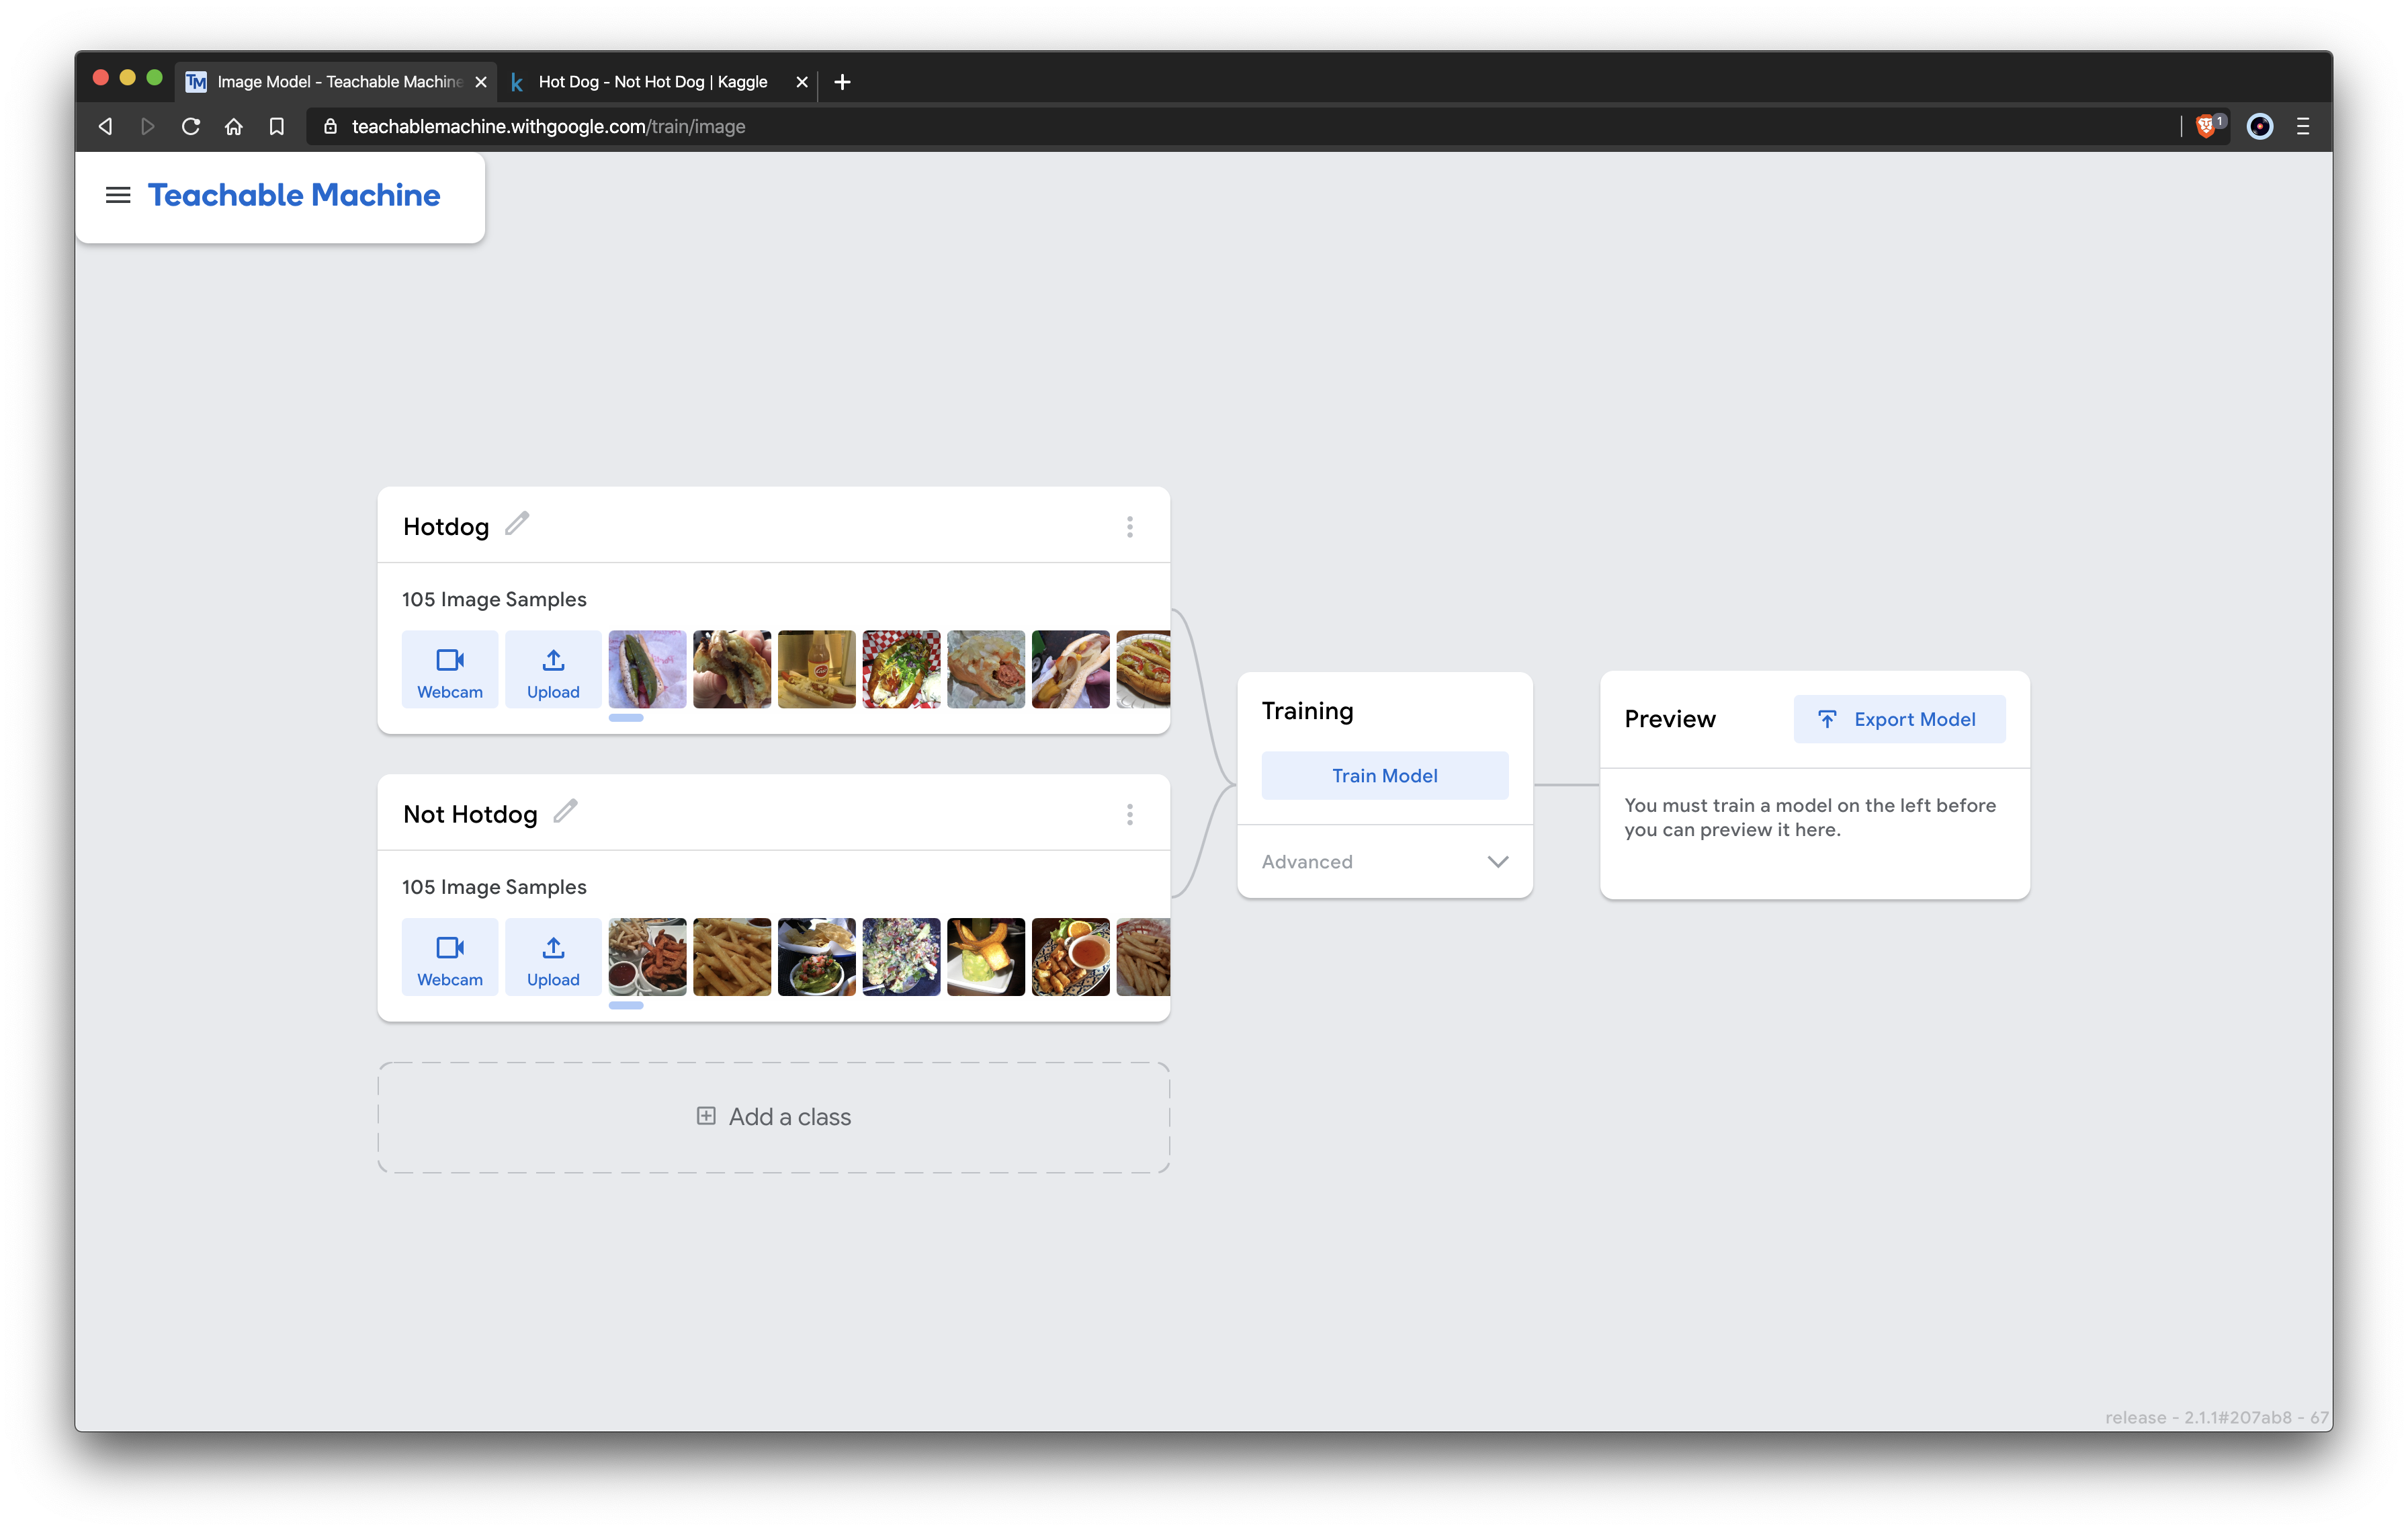
After uploading the images, we can train our model (this took about 10 seconds for me) and then test it out with some test images, it is important none of the images you test with are the same as the ones you trained with. Finally, we can export our model to use it with ML5 we can upload it to the cloud and then paste the link to our model.json file instead of using MobileNet.
Here is the Not Hotdog app that we’ve built using our own model.
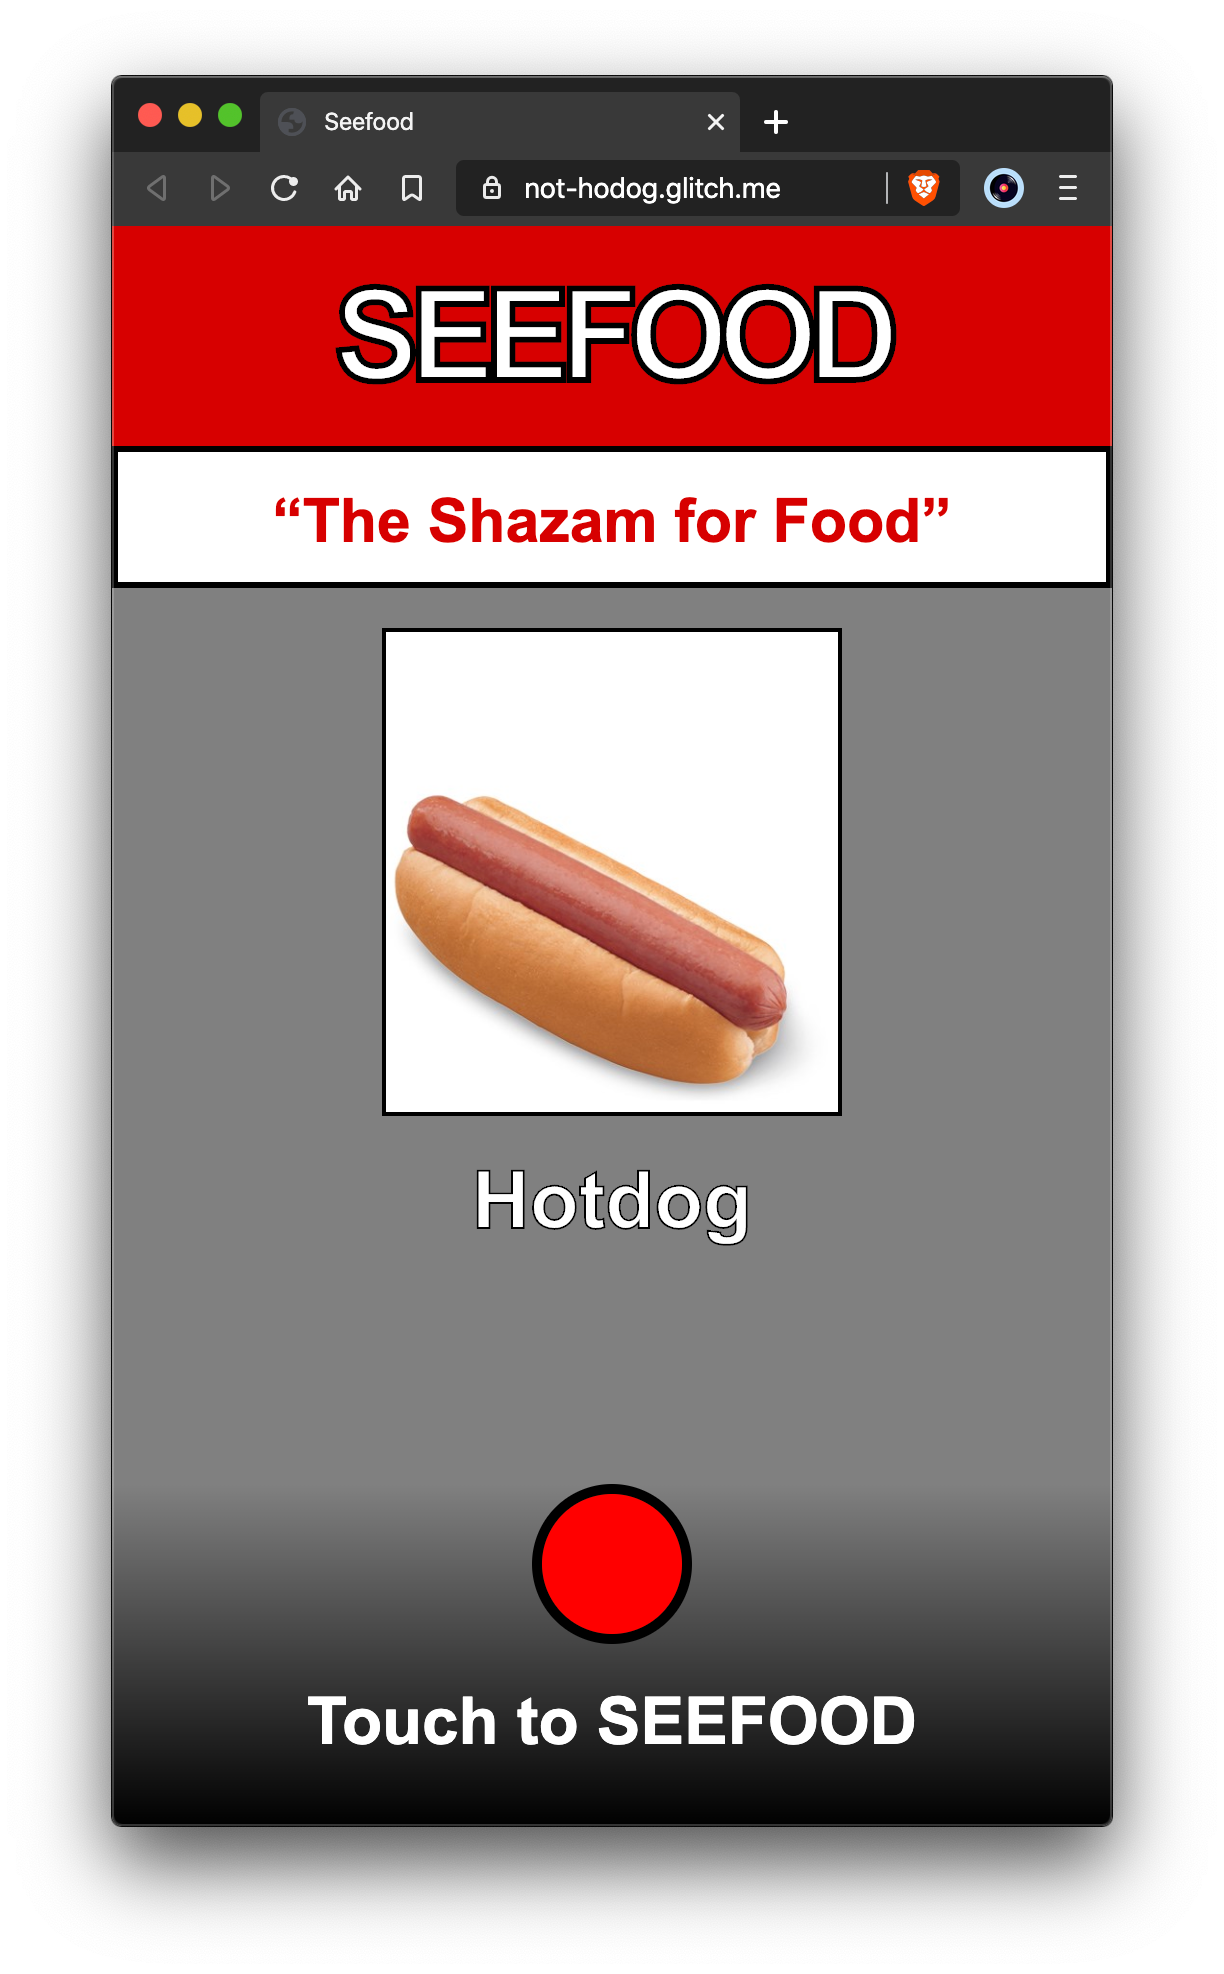
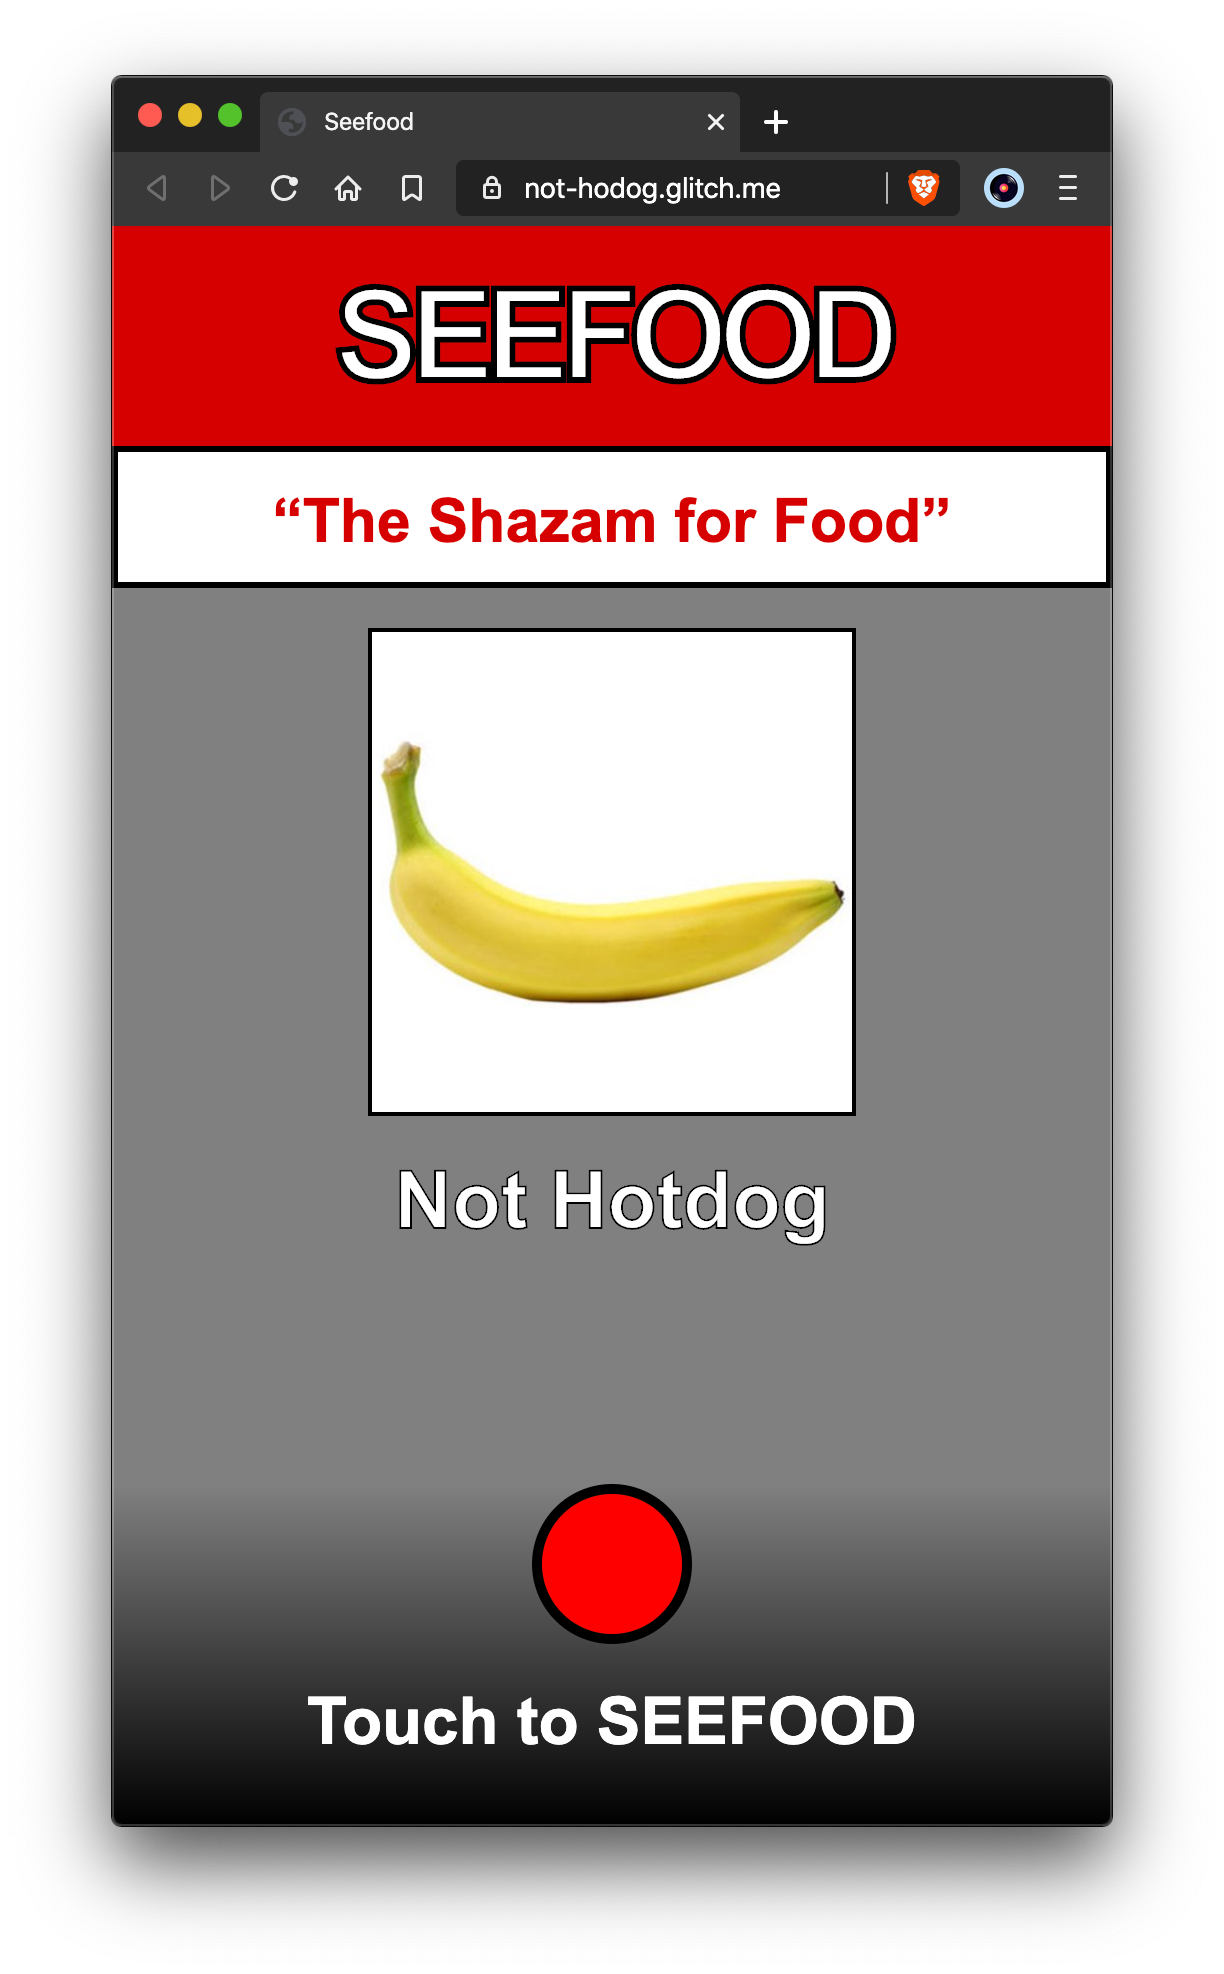
Since we only used two classes in the Teachable Machine model there are only two possibilities that our app can return. If we want to actually build Seefood with our own model we could create classes for each food we want to classify and then add training data for them. Teachable Machine and ML5 play really nicely with each other so it is super simple to create whatever you can imagine with JavaScript and machine learning.
The code for the app is available on glitch.
Follow me on GitHub: @maaslalani
Comments (0)